
A free program for creating DVD video images and burning them to disc.
Everyone has probably seen professionally made DVDs with all sorts of transitions and navigation menus. Have you ever wondered how these menus are created? Wouldn't you like to try to create something like this yourself? Probably, I wanted to (more than once :)).
Today we will learn how to create and record our own DVDs, which will be little inferior to their professionally made “brothers”. And one very good free program called DVD Styler.
The program combines everything you need for DVD authoring (as the process of creating menus is called) from scratch. And although it still falls short of professional solutions, it allows you to create a decent-looking disk with minimal time and effort. If we compare DVD Styler with paid analogues, then ZC DVD Creator Platinum will be closest to it in terms of functionality.
Comparison of the free DVD burning program DVDStyler with the paid analogue ZC DVD Creator Platinum
With relatively identical functionality, DVD Styler weighs five times less than its paid counterpart! Another plus is multilingualism, which makes the work of a Russian-speaking user much easier.
Installing DVDStyler
Download and install DVD Styler. In principle, the installation follows a standard scenario, but there are some minor nuances. The most important hitch will be associated with the proposal to install a plugin for Internet Explorer and/or Mozilla Firefox - kikin.
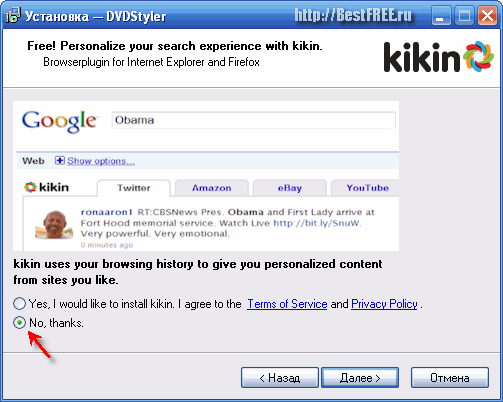
If you agree to install this plugin, then your browser, based on the history of pages visited, will begin to offer you the “most interesting” information from various online resources. If you can find everything you are interested in on your own, I advise you not to install kikin.
DVDStyler interface
When the installation procedure is completed, the program itself will start. The first (and, in principle, the only) thing you need to configure is the interface language.

Select "Russian" from the list and click "Ok". After this, you will see the program itself, which will offer to create a new one or open a ready-made project.
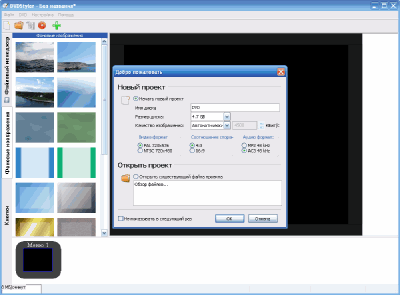
We choose to create a new one and set the required information: Disc name (optional), disc size (standard DVD or double-layer), video format (PAL/NTSC), aspect ratio and sound format of future films. Install it as needed and click “Ok” to start working.
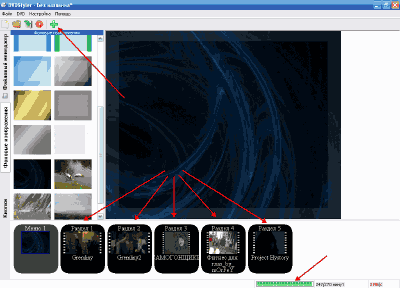
Let's take a closer look at the program's working window:
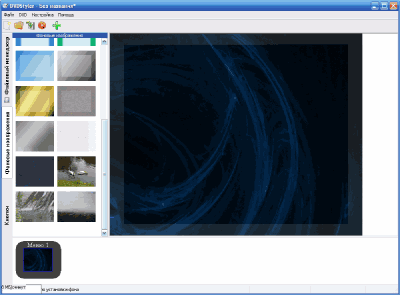
We hardly need the menu bar at the top, since all the necessary buttons are located on the toolbar (below). On the left is the program’s file manager, with which you can manage downloaded pictures and videos. Below is a kind of storyboard for navigating through the sections of the future DVD. The main space is occupied by the work area displaying the current active menu item.
Creating a DVD Menu
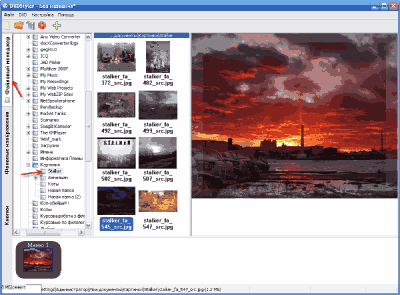
When creating a new DVD, we have one ready-made menu on the storyboard. True, it is empty. Let's add some background image to it. Go to the "Background Images" tab and double-click on the image you like. If the standard ones do not suit you, you can add any image from your computer.
To do this, go to the “File Manager” and find what you need. The drawing can be prepared in advance in any graphics editor so that it contains ready-made inscriptions and/or additional fragments that correspond to the general theme of the future DVD.
Adding movies
Once we have decided on the image, we can start adding films to the project (although this could have been done before choosing an image for the menu). This is done simply: click the “Add file” button and select the desired movie using Windows Explorer. It is better to do this by expanding the program window to full screen.
Why? Because in this case, in the lower right corner you will see a scale of how full the future disk will be over time. Be careful not to overdo it with the number of films!
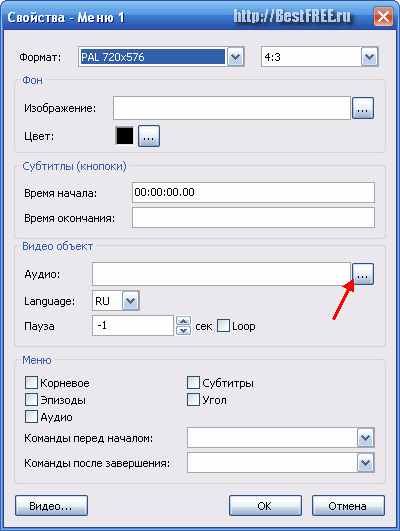
So, the films have been added, they’ve been completed within the allotted time, now it’s time to think about the menu. Right-click on it and select “Properties”.
Sound design in the menu
Here we can add sound to our menu (if we want, of course). Click on the button after the “Audio” field and select the desired music in the Explorer window that opens. You may be alarmed that the formats listed are only MP2 and AC3 files. Just set this field to "All files" and you can add any MP3 or WAV tune.
Typically, a DVD consists of several menus: a main menu, and an episode menu for each movie (although the latter are not the main attribute). We'll create a disc with just the main menu as an example.
Creating Buttons
We go to the "Buttons" tab and can add navigation keys to our menu by simply dragging the button you like directly from the list. I note that among the buttons there is a frame in which arbitrary frames from the movie “linked” to it will be displayed. Adding such frames significantly improves the overall appearance of the menu.
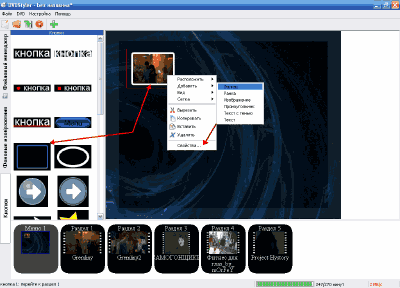
The first button is by default "linked" to the first added movie. Let's see what we can do with it. Call the context menu of the button by right-clicking the mouse. Here we are interested in two items: “Add” and “Properties”. Thanks to the first one, we can add a beautiful inscription (for example, the title of a movie) using the “Text” and “Text with shadow” items.
There shouldn't be any problems here, so let's take a closer look at "Properties".
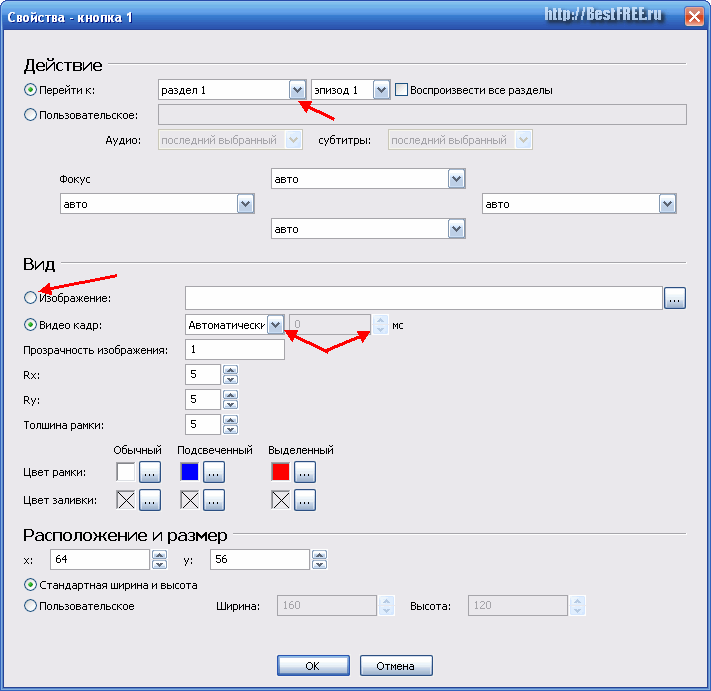
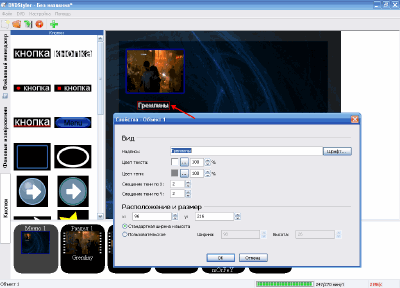
Here are all the settings for a specific button. In the first section we can set the action that will be performed when the button is clicked. This can be either going to a certain part of the DVD, or, for example, playing a certain melody or going to another menu. The "View" section is responsible for the design of the button.
In the case of a frame, we can install any image from a computer into it or allow us to install an arbitrary frame directly from the film (you can also manually specify the time of the desired frame). Here we also indicate the transparency level of the inserted image, the width of the frame and its color. It is better to adjust the location and size using the mouse.
Above we looked at how to add text with the title of the movie. However, the name can also be written on the button. Select the appropriate one, drag it into the working window and write the desired name in the properties. Then we “bind” this button in “Actions” to one of the films, and the job is done!
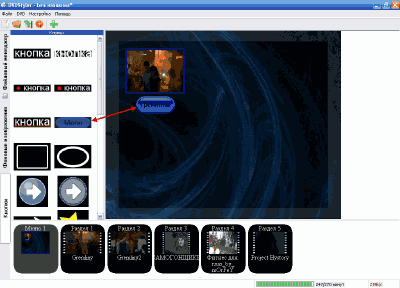
In a similar way, we create buttons for moving to other movies, and we will get a rather beautiful and functional menu:

Since all the films may not fit on one page, sometimes it will be very useful to make another one, linking it with cross-references to the first one. You can also add additional images if you have not taken care of this in advance.
Saving a project and burning a disc
Now that everything is ready, you can move on to the last step - saving. You can save a project, a disk image, or directly burn a DVD. If we don’t want to stop there, click the “Burn” button on the toolbar and be transferred to the following window:
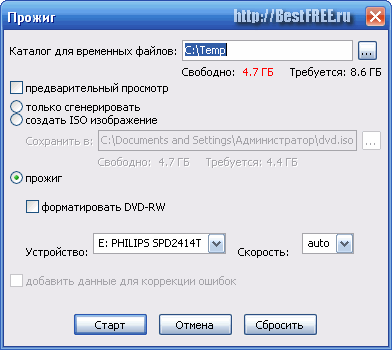
This is the “last bastion” of DVD Styler. Whatever you choose, in any case you will have to wait (and for quite a long time). After all, all files are first converted to DVD format, and only then can be burned to disk. For processing video, you will need free space on your hard drive (about half as much as the DVD project takes up).
You can reduce the size only if you select “Create ISO image” (probably the word “image” was translated incorrectly). If you choose this option, you will also need to specify the folder to save the image. You can also activate "Preview" after DVD generation by checking the appropriate option.
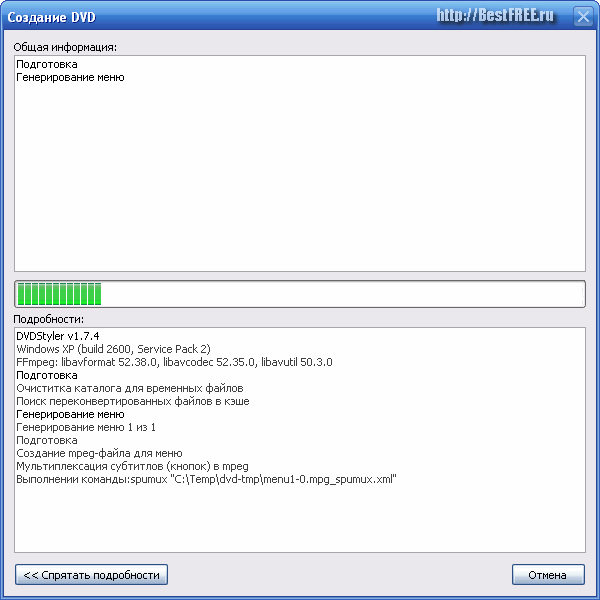
After all the installations, finally press the “Start” button and wait until everything is ready:
conclusions
As you can see, creating your own DVDs is not that difficult if you use good software. DVD Styler may not have some of the features that its paid counterparts have, but it is quite easy to use, and it has a lot of functions.
Another plus is that DVD Styler allows all manipulations to create a disc to be carried out within one window, which significantly saves time and effort when searching for the necessary tools. I wish you successful and beautiful projects that will give you joy every time you watch them!
P.S. Permission is granted to freely copy and quote this article, provided that an open active link to the source is indicated and the authorship of Ruslan Tertyshny is preserved.