
In the "Seven" there are a lot of pre-installed applications that not every user needs. The only problem is that they can't be removed. The user does not have enough privileges to delete the folder with the program, and the Control Panel object, which is responsible for uninstalling the software, does not have most of these programs.
We set out to tell users how to remove built-in programs from Windows computer 7, as well as how to correctly uninstall third-party software: after all, simply moving the directory with the application files to the "Trash" is not enough, and sometimes even this cannot be done.
Any program and game can be erased from a computer running Win 7 using the installer that installed the product on the system. It will transfer to the "Basket" all the files that were unpacked on the PC as a result of installing the software, and remove the entries from the registry that the application brought there.
Consider how to uninstall programs on Windows 7 using Smart Install Maker as an example.
- Open "Start" and click on the object highlighted in the screenshot.
- We find the directory with the name of the unnecessary component and go to it.

Many software developers put their own products in a separate folder with the company name (for example, directories with all ABBY products are placed in the directory of the same name), so beginners cannot always find what they are looking for. Although in this case the search string will help out.
- Find the shortcut to uninstall the application and click on it.
The name of the object may differ for various applications but the meaning remains the same.
- We carry out the instructions in the window that opens, which boil down to confirming the execution of actions. Sometimes there are suggestions to leave user data and settings that should not be neglected if in the future you are going to resort to the help of software to be removed.

- At the end of the operations, close the installer window.

Thus it is possible to produce Windows cleaning 7 from all unnecessary programs that are not pre-installed in the system.
The second way to erase unnecessary applications in the "Seven" is to run the installer manually. It is necessary in cases where the "Start" does not have a directory with the program or the "Uninstall" shortcut.
- Open the "Properties" of the application shortcut through which we launch it.

- Copy the path to the executable file through the context menu.

Notice the colon before the address. We don't need it.
- Open the "Explorer" by holding Win + E or otherwise.
- Paste the copied address into the address bar.

- We launch the executable file responsible for launching the installer and follow the suggested instructions.

Removing programs in Windows 7 in these ways has a couple of significant drawbacks:
- not always in the directory with executable files there is an uninstaller (primarily for products that are deployed using Windows Installer);
- a lot of temporary files, product settings, directories where they were, and registry entries remain on the hard drive, which slows down the operating system over time.
One of the Control Panel components, which was created to get rid of software, will help get rid of the first drawback. Next, let's figure out how to uninstall a program in Windows through the "Control Panel".
- We open it in any convenient way.

- Click on the "Uninstall programs" link.

If the icons are displayed as icons (not grouped by category), click on the item "Uninstall and install ...".

This element can also be called via search string"Start" or the command "appwiz.cpl".

- In the "Uninstall and change programs" window, select an object that is no longer needed on the computer, and call the command to uninstall it through the context menu or the corresponding button in the toolbar.

- An installer window will appear in front of us, where you need to perform several simple instructions, often different for different utilities.
Again, the classic methods are not without flaws. If you figured out the uninstaller, we will touch on the problems when some software components remain on the computer later. Now let's answer the question: how to remove unnecessary applications via command line.
Command line
- We call the command line in any convenient way: by executing the “cmd” command in the “Start” or “Run” window, or through a shortcut in the main drop-down menu.

- Enter the command "wmic" and press Enter to execute it.

If you saw an invitation, as in the screenshot, then the console utility was launched to read and provide the user a wide range information about your computer and operating system.
- We execute the following line: "product get name" to get a list used on a PC software, including games.
Among the built-in programs in the list, there are only those that were deployed on a PC when Windows Help installer.
Here you have to wait about a minute (depending on the power of the PC, the level of system optimization and the number of installed applications).
As a result, a list will appear. Finding the name unnecessary program and remember.

- We enter a command like “product where name=”paint.net” call uninstall”, where instead of “paint.net” we write installed program, which will be erased from hard drive, press Enter.

PowerShell
PowerShell is a powerful automation tool that appeared in Windows 7. Few people use its full capabilities, but in vain. Let's explore its potential by looking at how to uninstall a program through this tool.
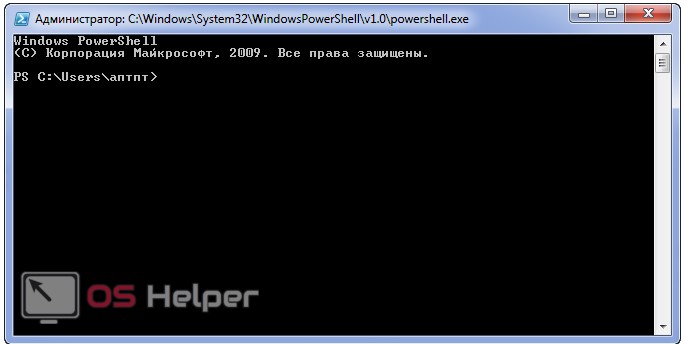
- We launch the automation tool in any way: through a shortcut or search in the "Start" ("Standard" - "Windows PowerShell"), or by the "PowerShell" command in the "Run" window.

A black window will appear similar to command line, but with a different greeting and cap.
- Enter the command "Get-WmiObject Win32_Product | ft name,version,packagename" to get a list of installed products and press Enter .

- The command "(Get-WmiObject Win32_Product -Filter "Name = "paint.net""). Uninstall()" will perform the action we need.

As the “Name” value, enter the name of the software that we want to get rid of.
The disadvantage of the method is the same as in the case of using the wmic utility - only products added using the Windows Installer are displayed. Since the majority third party applications use an installer that is different from WI, you will have to resort to third-party solutions.
Program uninstaller in Windows 7
On the Internet, there are a lot of utilities that can uninstall all applications in the Seven. The most functional of the list - Revo Uninstaller. Using her example, we will consider how to completely remove an application or game from a computer in Windows 7.
- Follow the link to download Uninstaller Pro.
It's fully functional free version utilities with the only limitation - it will only work for 30 days.
- We run the downloaded file and follow all the suggested instructions: choosing the interface language, installation directory and creating shortcuts.

- We call Revo Uninstaller.

- We find desired object, select it and call the "Delete" command through the context menu or by clicking on the button of the same name.

How to find all the necessary objects if there are too many of them? Enter part of the application name in the quick search bar.
- We are waiting for the rollback point (if system restore is enabled) and the registry backup to be created.

Both options can be disabled in the settings to speed up the process.
- After starting the built-in uninstaller, we execute its instructions, as in the first two methods.

- Next, select a scanning method to search for files and registry entries left after the software and click "Scan".

In the advanced mode, the most complete scan is performed, which guarantees the detection of all unnecessary components, but the process will be the most time-consuming, so we will focus on the moderate mode.
- We select all entries if they really belonged to the program being removed (in our case, there was an entry about the SIM interface language), and click "Delete".

Errors are excluded, but just in case, a rollback point and a registry backup are created, so there is nothing to be afraid of.
- We confirm the action.

- We mark the remaining files (for example, this Text Document with information to uninstall the SIM) or click "Mark all" and click "Delete".

- We confirm the operation.

The window will close automatically.
How to get rid of preinstalled apps?
As the final stage of considering the issue, we will study how to remove standard programs from a Windows 7 computer, or rather, disable them, because you can restore such components at any time.
- Open the "Control Panel" and go to the subsection displayed in the screenshot (we worked with it in the first method) or execute "appwiz.cpl".

- Click on the menu item "Enable / disable components ..."

It can also be launched through Revo Uninstaller: hold down Alt + T and click "Remove / Add Windows Components ...".

- Remove the checkboxes next to unnecessary elements, and click "OK".

- We are waiting for the completion of the changes.

- Reboot your computer or laptop to save the result.

That's all. There is only one problem left. How to uninstall apps that won't uninstall standard means(from the "Control Panel") or their uninstaller is missing?
Problem cases
If the program is not removed by the above methods, for example, it automatically starts with the operating system, you can find the desired process and kill it. However, services often start with such applications, and it takes a long time to complete everything manually. It's easier to use the Unlocker utility.
- Let's go here and download it.
- Install and run Unlocker.

- Specify the folder with the software to be deleted.

Through the properties of the application shortcut, you can see the directory where the executable file is stored.
In the next window, we find a process that uses objects from the selected directory.
- If it is one, then click "Unblock", otherwise - "Unblock all".

The process can also be “killed” if suddenly other buttons do not give a positive result.
You may also need forced deletion problematic file after unlocking it.

- After completing all operations to unlock undeletable files, you can use Revo Uninstaller or similar program to finish what you started.
Video instruction
In the videos below you can see how programs are uninstalled in Windows 7 in different ways.
Sometimes users but forget to delete the old one. There is nothing critical in this, but the old Windows takes up a lot of space.
This article provides information on how to remove old Windows 7 from a computer.
There are several ways to remove unnecessary Windows:
1. Removing old Windows using “Disk Cleanup”
You need to run Disk Cleanup. You can find it through the "Start". We click “All Programs”, there “Standard”, then “Utilities” and in the list we find the desired component.


It is the item “Previous Windows installations” that we need. Select the checkbox if it is not there and click OK. To the question about permanent deletion, we answer “Delete files”. After a while, the files of the old Windows 7 will be deleted.
2. Removing old windows without programs
If for some reason the program cannot be found or there are some problems with it, you can remove Windows manually. For this we find Windows folder.old and set the rights necessary for deletion.
Go to the properties of the folder (RMB - Properties) and go to the "Security" tab

Click on "Advanced". On the “Owner” tab, select the current user and check the box “Replace the owner of subcontainers and objects” and click “Apply”.

Now on the “Permissions” tab, select the account that we made the owner of the folder and change it (the “Change” button)

A window appears with the Permission Element, where we put a checkmark where it is highlighted in the screenshot below. Then click OK and with a security warning.

After the manipulations have been done, it will be possible to delete the Windows.old folder without difficulty, and the question of how to delete the old Windows 7 is solved.
3. Removing the old Windows formatting disk
This method is more cardinal, but as they say “failsafe”. The bottom line is that you need to boot from installation disk or flash drives and start installing a clean Windows.
At the moment of disk selection, it will be necessary to delete all partitions, mark HDD again and format all partitions. This way we get a clean system, without any sign of old operating systems.
If you set yourself new operating system Windows (any of the versions), now when you try to turn on the computer, you probably first see a menu with the choice of the desired OS. This happens if the hard drive has not been formatted. To prevent this from happening again, it is enough to remove the unnecessary version and only one version of Windows will remain on the computer.
Formatting a partition is the easiest and most obvious way
This is an easy way to remove a second operating system that you no longer need. The meaning of the procedure is to format the partition containing the extra operating system on the hard drive.Before starting any action, download important information for you on removable media or one of the hard drives.
How to understand which Windows folders should be left, but which one should be kept? To do this, go to the Start menu and select "Run" from there. You need to enter the following command in the line -% windir%. Now click "OK". As a result of your actions, a folder will appear. It must be remembered - this is exactly the folder that cannot be deleted. It may look like this: "C: Windows". This working folder you can neither delete nor move to other sections, otherwise the operation of the entire system will be disrupted and you will have to roll back.
Reboot the system and make sure the second OS is no more. If the system gives an error when trying to format the disk, then you can try using additional utilities for such operations, for example, the Acronis Disk Director program. It needs to be downloaded, installed and run. It will delete everything itself, and then automatically reboot the system.
How to remove unnecessary OS from boot
This instruction is suitable if you have a seven or eight installed. It happens that the second operating system, namely its files, is no longer there, but it appears in the downloads. To remove Windows from boot, follow these steps:

Now the download will start from the version of Windows that you decide to keep.
How to remove a seven or eight if you upgraded to ten
If you decide to upgrade to the latest version of Windows, then at the same time you need to clear the disk space. But do this only if you are completely satisfied with the new version of the OS and are not going to return to older versions.Usually, a standard utility for deleting old (temporary or junk) files is enough for these purposes. For example, CCleaner. But if the previous version is still taking up space, then follow the steps that will remove the remnants of the old OS completely.
- Go to the taskbar and through the search find "Disk Cleanup". Choose the desired label.
- In the tab, mark all temporary data and turn on the cleaning function.
- To delete the data of the previous system, click on the option " Clear system files". It is located at the bottom left.
- You will need to select the disk on which the old OS is located.
- When you see all the files you need to delete, there will be an item "Previous Windows installations". This is the item you need to select.
- We clean and restart the computer.
After these steps, it is already very difficult to roll back to a previous version of Windows, so make sure you decide to leave Windows 10 permanently.
How to remove old Windows without programs
Let's say you have Windows XP and you're happy with it, but Windows 7 gets in the way. Maybe, and vice versa - we arrange the seven for everyone, but we don't like XP. In any case, how to remove the old, unnecessary operating system?This method will allow you to remove the old version without using programs - manually.


After that, Windows.old will be deleted as a regular file folder.
How to edit boot.ini
If we are not talking about Windows Vista or the seven, then the loading of the operating system begins with the boot.ini file. It is written in it:- waiting information when a download option is selected;
- data about the operating system, which is included first by default, if the choice has not been made by the user:
- Extra options.
As always, we start by loading into the version of the operating system that should remain the only one on the computer.
- We find "My Computer" on the desktop and click to open the characteristics.
- Select "Properties" - look for the "Advanced" parameter.
- Next, find "Download and Recovery". Click on "Settings".
- In the new window, select "Edit". The boot.ini file will open with Notepad. It is highly advisable at this stage to save a copy of this file just in case and put it on one of the disks. Do not forget to rename it at the same time - Boot.old. Now you can forget about the copy and return to the boot.ini file for editing.
- Find the line in the file that says that the menu displays two operating systems to choose from. It needs to be removed.
- Now let's save the changes we just made. Click "Save As", keeping the name as it was originally.
How to remove unnecessary Windows XP?
Windows XP has its own characteristics, they must be taken into account when uninstalling.We boot into the operating system that we plan to leave.
- On the "My Computer" icon, look for the "Properties" parameter using the right mouse button.
- Now we find "Advanced". There will be a "Settings" function.
- We mark the operating system that we plan to remove and confirm our actions.
- Go to the section where the old Windows is located.
- Delete the folder Windows, editing with program files and Documents and Settings. There will be pop-up warnings that this is system files and that they can be read-only. You can safely ignore them and continue deleting.
Windows.old removal video
If you have any questions about deleting this impressive folder, then watch the video.As you can see, the old interfering operating system, if it is no longer needed, can be deleted. Depending on which OS is installed, the removal operation has its own characteristics, but in general, almost all methods are suitable. It is enough just to understand the nuances and carefully follow all the steps. After the reboot, you will successfully get rid of the problem.
Today there will be a post on how to demolish the old Windows and clean install new operating system . I will tell you how to demolish Windows completely. For some reason, many do not understand this.
What does it mean to demolish Windows?
To demolish Windows means to format the disk with installed Windows and install it on a blank disk. In simple terms, demolishing Windows means correctly deleting the old Windows.
Windows installers are divided into 2 types.
First, write it to disk. Run the disk from under the old Windows and start the installation. This WRONG DECISION installation of any Windows.
Disk formatting
With this approach, Windows 7 is completely neutralized during the installation of another system by completely formatting the disk (that is, its contents are completely erased). The installation discs, both XP and Windows 7/8, have all the necessary tools to implement this feature. Let's learn how to use them.
Note. If you do not want to switch to a new system, but simply want to reinstall Windows 7, correctly remove the old distribution and install a new one, you can also use the instructions below.
1. Insert the installation disc of the operating system you want to install (XP, 7, 8, or 10) into the DVD drive.
Attention! Before following the next step in the instructions, ask which key on your computer activates the menu for setting up the boot of disks and devices or the BIOS (add-on shell) into which this menu is integrated.
2. Click Start. In the drop-down menu (shutdown), click the left arrow icon and select Restart.
3. During the reboot, hold "F2", or "F8", "F9", "F12" (depending on the computer manufacturer! See note).
When the “Please select boot…” window appears:
- use cursor arrows to select CDROM in the list;
- press "Enter".
If the boot order of disks is performed in BIOS, do the following:
in the "BIOS SETUP UTILITY" menu, go to the "Boot" tab;
open subsection " boot device priority";

in the additional "Options" window, use the "up" and "down" keys to select "CDROM".

After completing this setting, at the time of rebooting the PC, first of all, turn not to the system partition, but to the installation disk. Which is required in this case.
Windows XP:

- upon completion of the preparation procedure, when the XP installation menu appears, press "Enter" (thus, you select the first item - "Proceed with installation");
- press "F8" to accept the agreement;
- select system partition(the section on which this moment time Windows 7 is installed) and press "Enter";
- select the "Format partition ... NTFS" function from the list or the same function marked "Quick". And press "Enter" again.

 If it is not there, or you simply forget to copy it to a notepad, you will not be able to fully install Windows on your computer. But all other files left on the "C" drive (where the OS is installed) will disappear during uninstallation.
What about a laptop?
If this is a laptop, then you can look at the key to the operating system on its back side. In the case of the "pirate" such a trick will not work. Here you need to write down the key in advance and enter it separately during installation. If the inscription on the back of the laptop is erased, you can find the password on the Web.
How to uninstall Windows 7 from your computer if you don't have the original installation disc?
The absence of the original installation disk is not a problem for an advanced user, because you can download the "original" Windows iso image on almost any relevant site. If you want to remove Windows 7 from your computer, remember that the key to the "pirate" may be different, so be very careful - write down the password that is indicated along with the link to the archive with the OS.
Now download the program to burn the image to disk. To do this, you can use the ImgBurn utility. After it has been downloaded, install it on a PC, take a blank DVD + R (or RW - it doesn't matter) and insert it into the rum. After that, open the recording program, click Browse and select the item " Windows image". Click "open", set it to the minimum speed and wait for the utility to write the file.

Next, you will see a window with information that the disc was successfully burned. Press "OK" and remove DVD + R from rum. Don't be afraid if the disc ejects itself automatically after recording - this is how the program works. The first step has been completed. Now about how to remove Windows 7 from your computer.
First of all, set the BIOS value to "First boot device CD-Rom". You must first reboot or and press delete. In some cases, you can also use the F1, F2, F8, and Ins keys. To avoid confusion, the program itself will tell you on the screen of its monitor which button to press to enter the BIOS.
How to understand that you are already in BIOS?
Here you will see blue screen with white characters. Now we set I to boot from disk. To do this, on the arrows, go to Advanced Bios Features, then to First Boot Device and select CD-Rom. It is worth noting that even with a Russified version of the OS, the installer language will be English. Stop at the CD-Rom partition, press the enter key and then esc. Now go to save&exit setup, press enter, Y, and then enter again.

It should be noted that even with different BIOS versions, the algorithm and the essence of its work do not change. The main thing is to find the First Boot Device section and select the CD-Rom item in it.
If you did everything correctly, then after that your computer will automatically restart. Moreover, at startup, a white inscription Boot from Cd / Dvd will be displayed on the monitor. After a while, the computer will require you to press a key on the keyboard (Press any key to boot from Cd). Choose any, even a space - it does not change the essence of the matter. Next, a black screen will appear with the OS installation bar.
The operating system itself is removed automatically, you will only need to confirm this action.
Now we have to reinstall the step (and uninstall the old "Windows" as well).
After a black screen with a loading bar, a window should pop up that says "Windows is loading files". Here you need to wait a few minutes until a window appears with a choice of language. You will have to wait from 5 to 10 minutes.
Now use the arrows on the keyboard to get to the item "Install" (Install) and press enter.

At the same time, when the window with the "License Terms" appears (this is about 5-6 minutes after pressing "enter"), check the box there. Then press the enter key again.
Select the item " Complete installation", Select the installation disk with the recorded image. Click "Disk Setup" - "Format". This is where the main thing begins - all files that were previously on the local drive "C" are uninstalled. How to remove the second Windows 7? Everything happens in the same way as above. All processes and stages take place according to a similar principle, so there should not be any problems with this. Now you know how to completely uninstall Windows 7.
For 12 months of working with a computer, each of us accumulates a lot of files and information that we save on the C drive. Therefore, to see them again after the "resuscitation" of the OS, copy them all to a safe place. This place can be either a flash drive or a local drive "D", the files in which are not deleted when you reinstall Windows. As practice shows, the latter option is more convenient and simple, since the flash drive often may not have free space for your data. Therefore, move all important documents to the "D" drive.
 And for the future, install all programs there and store all files, and display shortcuts on the desktop. So there will be much less hassle when installing new drivers, programs and everything else.
Uninstalling Windows
How to uninstall Windows 7 from a computer? After pressing the "Format" button, the system will automatically clear the "C" drive from all files - necessary and unnecessary, old and new. The OS is also deleted by itself. All this will take about 20-30 minutes. At this point, you can go make a cup of coffee or just watch the computer delete data. In any case, no action is required until the disk is formatted.

When the disk formatting is completed, you will see a window with fields for entering a username on the screen. Here we need to enter the name, password (optional) and product key. If you accidentally clicked "Next" and did not enter the key, the computer will ask you to enter it again, but a little later. Now you need to select one of the three items for updating. You can choose any, but, as practice shows, the first one will be the most suitable.
We determine the time zone and wait a few minutes until a window with "Windows 7" appears on the screen.
Now you will definitely know 7 when you reinstall the OS. As you can see, there is nothing complicated here - most of the operations are performed by the computer itself. The main thing is to copy all important files and folders to local disk D, otherwise all of them, together with the operating system, will be permanently deleted.
Why is DirectX installed on a computer?

In general, DirectX is needed in order to ensure the normal operation of graphics. Without it, games simply will not work properly. This is what determines its importance. This set of dynamic libraries is installed immediately after uninstalling the old OS. It can also be included in the archive with any game, which allows the user to fully enjoy the excellent game graphics.
However, if your installation of DirectX failed, or its version is too old, there is a need to reinstall it. You won't be able to update it. Only complete uninstallation and installation will save you.
What program is right for you?
And before uninstalling DirectX Windows 7, first you need to download a special utility. The most popular of these is the DirectX Happy Uninstall program.
 Thanks to it, you can completely remove the DirectX package from the OS, while maintaining its stability and performance.
It is worth noting that this program supports all versions of packages. Also, before removing DirectX from the computer, it creates a backup copy that allows you to refuse the removal in case of unsuccessful completion of the process and roll back to the original state of the system. Happy Uninstall can also detect errors that were made by other programs when trying to uninstall DirectX. This utility is absolutely free, and you can download it from the official website. How to remove Windows 7 files from DirectX folder? They are uninstalled automatically, so there is no need to manually do anything in this folder.
DirectX Eradicator
No less popular program is also DirectX Eradicator, which also works with all versions. this package and removes components and files from the system without harm to the OS. Another an important plus of this utility is its ability to work without installation.
How to restore DirectX?
After uninstalling, you can download the drivers through the Windows installation disc. You can also pre-download any version of DirectX from the Internet. Its image should be written to an empty DVD-R or RW disc or flash memory. In addition, you can find it in the file of a game, for example, in GTA SA. 
How from a computer?
In general, you should not delete them, because it can be bad for the OS. However, if you have already decided to take this step, follow the instructions:
- Click "Start", go to "Control Panel" and open "Installed Updates".
- In the Programs section, click View Installed Updates.
- Select the update you want to uninstall. Then click the "Delete" button.
- Everything, the update has been successfully uninstalled!
So, we figured out how to remove Windows 7 from a computer, and learned all the steps for reinstalling the operating system. As practice shows, even beginners can cope with such a task. However, after uninstallation, you need to take care of one important detail - drivers. The main ones are realtek and DirectX. But in fact there are dozens of them. There are drivers for the modem, webcam, microphone and usb devices. Therefore, in order not to search and download them again each time, download them to a separate disk and, after installing the operating system, load it into rum and install it.
It's time to free the hard drive from the unnecessary "seven"? There is nothing complicated in this, but many users do not dare to delete it in one fell swoop - simply by formatting the partition, for fear of erasing important data or disrupting the second OS. And they are right: if you immediately format the system partition, all its contents will be irretrievably lost. And it can contain both user files and loaders of other operating systems, if there are several of them on the computer.
Let's talk about how to demolish Windows 7 safely.
Removing the only Windows 7 operating system
How to remove Windows 7 from a PC if it does not have other operating systems? Before proceeding with the deletion, transfer the data important to you from the system partition to another medium. As a new medium, you can use other sections of the same disk, DVD, flash drive, cloud storage etc.
The user's data is stored in the user's account folder by default. It is located in the C:Usres partition (Disk C, Users folder).

Having gone there, simply copy the directory of your account and paste it on any drive that is suitable in capacity.

Now the system partition can be freed. While Windows 7 is loaded, you will not be able to delete its directories and files - you will first have to start the computer from another medium - a Live CD or an installation disk of any operating system.
So, booting from the Windows XP Live CD, we can go into disk management, find the partition with the "seven" and format it (formatting, like other partition operations, are launched from context menu). After that, the partition will be completely cleared of data while preserving the NTFS structure - it, as before, will be visible in Explorer.

If you select the "Delete partition" option from the menu, the system partition will turn into unallocated space, which, in order to use it, will also have to be pre-formatted.

You can also achieve data removal from the Windows 7 partition by formatting from under the installation disk. Other (non-system) partitions will not be affected.

Removing the old system (windows.old folders)
Now consider the case when a new operating system was installed on a partition with an old one without prior formatting. In progress Windows installations on the nonfree partition, the installer renames the old Windows directory to Windows.old. The Windows.old folder remains on the PC only as a data backup and is not used in any way, so it can be safely demolished.

How to remove Windows 7 from a previous installation? The safest way to do this is through Disk Cleanup.
- Going to the "Computer" folder, open the properties of the section where both systems are installed - the old and the new. On the General tab, click the Disk Cleanup button.

- Click Clean Up System Files.

- Check the "Previous Windows Installations" box and click OK.

Confirm your consent to delete files and wait for the cleaning to finish. After that, Windows.old - the old Windows 7 directory from the previous installation, will disappear.
How to remove "seven" from a multi-system configuration
How to uninstall Windows 7 if multiple operating systems are installed on the PC? This is done in two steps:
- format the partition with the "seven" according to the instructions given at the beginning of the article;
- remove it from the boot menu of operating systems.
After formatting frees the partition, Windows 7 will still be in the boot list.

To remove it from there, load the OS remaining on the computer (for example, Windows XP or 8) and log into it with administrator rights. Through the search, run the msconfig.exe system configuration utility.


Restart your computer for the settings to take effect. "Seven" will no longer be displayed on the boot configuration screen.

The partition released after formatting can be attached to one of the remaining ones, used to install another operating system or to store data.
Which can take up several gigabytes of disk space. Moreover, in the boot menu, the previous windows version continue to “hang”, offering the user to boot from them. In addition, they clog the PC hard drive and slow down its work. So, how to remove the old Windows?
Through the Disk Cleanup menu
Put away old version windows is possible through the disk cleanup utility, which is available in all Microsoft operating systems, including windows 10
Go to Computer and click right click click on the icon of the section where the previous version was. Select "Properties", then "Disk Cleanup".
The system will start scanning this section for the presence of trash files; among them will be the item "Previous installations of Windows"
Make sure it is ticked.
Confirm deletion. Windows will ask you again if you want to continue the operation - click "OK". After a few minutes, the utility will inform you that all trash files have been deleted.
The Disk Cleanup utility can be called in another way: left-click the Start button and enter the word “Cleanup” in the search bar (works for Windows 10/Windows 8.1 as well). In the list that appears, select Disk Cleanup. Click the "Enter" button. The utility will prompt you to select the partition where the cleaning operation will be performed.

The previous version of windows can be detected and removed using other cleaner programs. You can use, for example, CCleaner, latest version which has been optimized to work with windows 10. You can install other utilities - Glary Utilities, IOBit advanced care etc. The main thing is that they support work with windows 10/8.1/7.
Removing the "windows.old" folder and adjusting the boot menu
It happens that neither the standard Windows cleaner utility nor a third-party one can find old files. This leads to the fact that the user has to search for the "windows.old" folder himself, delete it, and then disable the option to select an already non-existent version through the Windows boot configuration menu. But for this you need to set the rights of the system administrator
How to do it? Very simple: press the key combination Win + R, enter secpol.msc and click "Enter". In the left menu that appears, double-click on " Local Policies”, then – “Security settings”. After that, now in the right window, look for the item "Accounts: Status "Administrator". Double click on it and switch from "Disabled" to "Enabled" and save the changes.
After that, you need to reboot and run a new (not old!) version of the operating system. After the main stage Windows boot will prompt you to log in through two accounts, among which there will be an administrator. We go right through it. Everything, now you can play around with the system as a system administrator.
Now you need to go through the "Explorer" to the section where the "windows.old" folder is located and delete it. To do this, right-click the manipulator on the icon of this folder and select "Properties". Then you need to click on "Security" and then on "Advanced". Among the proposed tabs, select "Owner", click the "Change" button and select that account, from under which the deletion will be performed. Save the changes with the "Apply" button and click "OK".
A message will appear that we have become the owner of this directory. Click "OK". Now you can delete the “windows.old” folder (after moving it to the “Trash”, this directory must be removed from there as well).
Now you need to go to the boot configuration menu. Press the key combination Win + R, enter msconfig and click "Enter". Go to the "Download" tab and select the previous Windows versions. Click the "Delete" button

The computer will prompt you to restart. We agree and restart the system. That's it, the question "how to remove old windows" is resolved.
In a situation where the computer starts to work slowly, the only right way out among the recommendations for self-configuring the computer is to reinstall the operating system, but this is not always done correctly, so then it becomes necessary to remove the old windows after installing the new one. Usually the OS is installed on a clean partition, but if it so happened that you installed a new operating Windows system there (at the same logical drive), where the old one is, it will automatically remove the files of the old operating system into a folder called "Windows.old". After everything required files have been saved, the folder with the old OS can be deleted. Especially since hard drive space is never superfluous. This can be done in two ways.
Removal using Windows
Boot Menu Cleanup
After you installed a new operating system on the same partition, you may have a problem in the form of a menu that prompts you to choose which OS to choose when you boot. This problem is fairly easy to solve.
- Click "Start";
- Type msconfig in the search bar;
- Select this program in the search results;
- In the next window, go to the "Download" tab;
- Select the old operating system;
- Click the "Delete" button, after which the program will inform you about the need to restart;
- Restart your computer.

After all the above steps, the operating system will boot in normal mode and the menu with the choice of the operating system will no longer appear.
There is nothing difficult in how to remove old Windows installations, the main thing is to decide on the method of execution. Now you can start sound settings on your computer, and setting up drivers, networks and other things with peace of mind. Remember: in order to avoid the procedure for removing previous versions of operating systems, it is recommended to carry out Windows installation to a pre-formatted partition. Thus, you will save your new operating system from garbage in the form of programs and files. previous version Windows.